Lesson Plan | Tools and Work Area
Summary
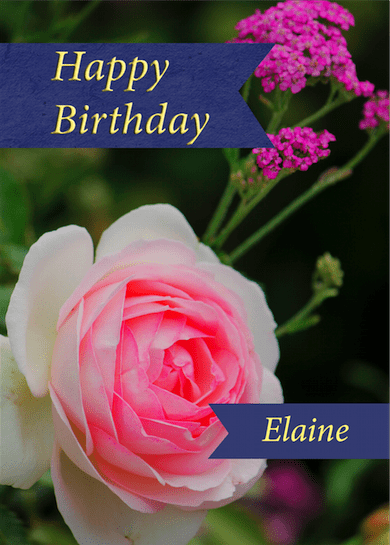
Learn your way around the workspace by making a greeting card.
Prerequisites
Software and basic computer skills
Adobe Photoshop CC : Free trial at- https://www.adobe.com/products/catalog.html
Identify “Cmd” “Alt/Option” and “Ctrl” buttons on your keyboard
Mouse Operations: Click, Right Click/Ctrl+Click, Mouse-Over (Hover), Click+Drag (Scrub), Shift+Click, Opt+Click
Procedure
Download or Copy Project files: Lesson 1: Start.psd and End.psd
Reset Workspace Settings: to alleviate navigation semantics
Launch Photoshop CC and Hold Cmd+Shift+Opt. (mac) / Ctrl+Alt+Shift (Windows)
Zoom Tool
- Open file: Start.psd
- Click double arrows on tool panel to toggle single or double column.
- Examine status bar at bottom left for zoom scale.
- Hover over magnifying glass to prompt tooltip.
- Click zoom tool or (Z)
- Move pointer over image window
- Click to zoom
- Alt/Opt+Click to zoom out
- Select “scrubby zoom” in the options bar
- Click and drag to zoom in and out
- Deselect “scrubby zoom” and draw a rectangle
- Click and drag diagonally over a region of the image
- Zooming and Scrolling with the navigator
- Find Navigation Panel
- Drag highlighted box to move view
- Drag slider left and right to zoom in and out
- Click “fit screen” Cmd+0
Brighten Image
- In the “Layers” panel at the bottom right of the workspace, make sure the “Rose” layer is selected.
- In the Adjustments panel, which is above the layers panel, click the “Brightness/Contrast icon to add a Brightness/Contrast Adjustment Layer.
- In the Properties panel, move the Brightness slider to 98 and the Contrast slider to 18
- These values are contingent on goals and taste.
Note: Adjustment Layers affect all the layers below unless used as a clipping mask.
Color Sample
- Make “Ribbons” layer visible
- Click visibility column in the layers panel (eye icon)
- Select layer with desired color
- Select the eyedropper tool
- Click the color in the image to sample (i.e. purple ribbon)
Tool Properties
- In the tools panel select “type tool” (T)
- In the options bar (top of screen) select a font you like
- Select desired font size
- Type directly or scrub icon
- Click on the layer and type text
Panels
- Make sure horizontal type tool is selected
- Drag cursor across text to select it
- Click swatches tab
- Select desired color
- Click (√) check mark in the options bar to commit text which also deselects it.
- Click menu button in swatches panel, choose “small list”
- Select type tool and reselect the text as you did in steps 1 and 2
- Select light yellow orange
- Commit and deselect text (√)
Undo
- Choose Edit>Undo edit type layer or press Cmd+Z (Mac) Ctrl+Z (Windows)
- Choose Edit>Redo type layer or Cmd+Z (Mac) Ctrl+Z (Windows)
- Select the move tool (V)
- Click and drag the type layer to the desired location
- Save the file as StartEdit.psd
Context Menus
- Zoom in a little
- Select the rectangular Marquee tool (M)
- Shift+M to cycle shapes
- Drag rectangular marquee to create selection approximately ¾” tall x 2 ½” wide
- Select the brush tool
- Right click/ctrl click in image window to open brush context window
- Select the first brush (soft round)
- Change the size to 65px
- Click image panel to close context menu
- Drag cursor across selection until rectangle is painted blue
- Deselect
- Select>Deselect or Cmd+D (Mac) Ctrl+D (Windows)
Hidden Tools
- Select the lasso tool (L) or click on icon in tool menu
- Select the polygonal lasso tool.
- Click+hold over tool icon
- Alt/Opt+Click tool icon
- Or press Shift+L to cycle lasso tool variations
- Click on a point in the image to start selection
- Move cursor+click to make first side of polygon
- Move cursor+click to make second side
- Click initial point to finish
- Or hit enter/return
- Press delete to delete selected area of layer
- Deselect
|
|
Materials
Drive Folder
Practice Image
File Types Cheat Sheet
Photoshop Reference Guide (print)
Other Resources
DNG Converter
Photoshop Reference Guide (web)
Photoshop History Log
|